With so many watch strap options out on the market, swapping out your watch band can be the most valuable skill set for the watch aficionado. Owning multiple straps can expand your collection and your wardrobe, all with one easy task. A simple strap swap can revitalize your watch face or take the entire look of your outfit to the next level.
Changing your watch band is a straightforward process when you have the right tools.
Changing the Band
We'll start with how to remove a leather strap, as well as discuss removing or installing a metal bracelet-style band and finish by quickly reviewing the installation of a NATO band, the fastest band to remove and replace on the market.
For this process, you will need:
- Your current watch with band
- New watch band
- A soft cloth (a towel, t-shirt, or jewelry cloth will do)
- Standard or mini spring bar tool
- New spring bars (if needed)
Removing the Current Band
First, you will need to remove the watch band currently on your watch. You will want to do this without damaging the watch face or crystal. Lay your watch flat on its face on top of your soft cloth as it is best to work from the backside of the case. The fabric will protect the watch crystal/face from scratches that could occur if placed directly on a hard surface, and this will make access to the lugs much more straightforward. The bonus of working from the back is that if you happen to scratch the lugs while removing the spring bars, this won't be visible from the front of the watch.
Now, grab your spring bar tool, flip it to the forked side of the tool, which will allow you to compress the spring bars easily and slide them out of the lugs.
Insert the forked tip of the spring bar tool between the strap and the case lug. It is best to have your watch face positioned to be able to press towards your body so you can get the best pressure and still hold your watch face flat. Then slip the forked end of the tool between the shoulder of the spring bar and the lug. Press the spring bar towards the strap to compress the spring inside the bar. You should be able to slide the spring bar out to the side quite easily with your tool, allowing the entire strap to be removed with the spring bar still inside the strap.
To remove the other side of the strap, simply flip your watch over and repeat the process. Slip your spring bar tool between the lug and the spring bar shoulder, press down on the spring bar towards the strap, and then to the side, and there you have it, the second strap slides out just as quickly as the first.
To replace your strap with your new watch band, you will need to insert spring bars into this strap. You can use the spring bars from your old strap, or use this as an opportunity to replace them with new spring bars. Spring bars can become damaged during regular wear, and the springs do loosen over time, especially when replacing your watch strap often. Simply slide the spring bar into the spring bar strap section and make sure that you can see the ends of the spring bar on each side of the new strap.

Attaching the New Strap
Next, we will need to attach the new strap, since your watch is lying face down, flip your strap over with the backside facing up so that your band will be attached to the proper sides.
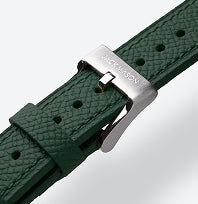
Now grab the short side of your strap, the side with the clasp. You will want to make sure you attach the right side of the strap to the right side of your watch. The short side, the side with the buckle, is attached to the 12 o'clock side of your watch.
Check your watch face and make sure you flip the face accordingly before attaching the shorter side of the band before you begin.
Slip one end of the spring bar into the lug pinhole and use the forked end of the spring bar tool to compress the opposite side of the spring bar, push it down, and use your tool to slip it toward the opposite lug positioning inside the lug. Give it a gentle wiggle till you hear the spring bar click, this is how you will know the spring has released and is securely elongated within the lug. Giving your watch band a little tug will ensure that the spring bar is, in fact, firmly in place.
Flip your watch to the other side and grab the long part of the strap with the holes for the clasp. Repeat the process by lining up your strap and place one end of the spring bar inside the lug.
Use your spring bar tool to compress the spring bar's shoulder down toward you and slide it towards the watch lug. Again, gently wiggle the strap till you hear the spring bar click into place. Make sure the watch strap is attached securely by giving a few tugs on both sides of the straps before putting the watch on.
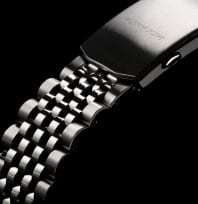
Installing a Metal Watch Band or Bracelet
If you have a metal watch bracelet without end pieces, the steps to change your band will be very similar to the above steps for a leather band. However, if you do have end pieces for your metal bracelet, there are just a few more steps to secure the bracelet.
Follow the steps above, lay your watch face flat on a soft cloth. Now grab your metal watch band, spring bars, and your two end pieces, plus your spring bar tool. Since a metal watch band can be a single piece with the clasp connected or two separate pieces, you will want to make sure the band faces the correct way for clasping the band around your wrist.
To determine the left and the right side of the bracelet and lay the band flat unclasped. If your clasp folds up and over to the right, then you have the first side in your hand and can flip your watch face over with the 12 o'clock side pointing to the left. Line up the end piece with the end of your bracelet, making sure the holes on the watchband and the end piece line up one of your spring bars inside the two pieces. Make sure you can see the spring bar stick out both ends of the watch bracelet and the end piece and repeat the steps above to line up the band, compress the spring bar and slide it into the lug hole using your tool. Be sure to repeat the wiggling process until you hear the spring bar click.
It can get a little tricky to attach the other side of the metal bracelet to the watch face, in this case, we suggest that once you have flipped your watch face over with the six o'clock pointing to your left, that you unclasp the band, so you have more room to work. Then slide your end piece onto the bracelet end, lining up the holes with the bracelet holes again, and push your spring bar through both pieces till you see the spring bar on both sides.
Now, flip your watch face up on its side, this will help keep the bracelet out of the way while you insert one side of the spring bar into the lower part of the watch face. Keeping the watch on its side and holding it and the lower part of the bracelet that is already inserted into the lug hole with your left hand, use your spring bar tool to press down on the shoulder of the spring bar and slide it up to the hole of the top lug. Once in place, carefully wiggle the spring bar around till you hear it click into place.
How to Attach a NATO Strap to Your Watch Face
A NATO strap is one of the most uncomplicated straps to attach and replace due to its single-piece design. Its design versatility and durability make it one of the most popular straps on the market. For this reason, many watch collectors have several different colors and patterns of watch straps to change their bands to suit their mood, activity, or outfit.

To install a NATO strap, you must first make sure that your spring bars are already installed on your watch case. If you've already removed your previous strap and spring bars, position your watch the same way as above and simply insert one end of your spring bar into the lug of your watch face, press down on the shoulder of the spring bar with your spring bar tool and slide it towards the other lug. Once you have lined up the lug, you can use your spring bar tool to move it around until you hear it click. Since you don't have a strap on the bar to test its security by pulling, simply grab the spring bar between your thumb and finger and give it a few tugs to make sure it is in place. Now repeat for the other side.
Now onto installing the actual NATO band like our beautiful, one of a kind 20mm Cork Strap, grab the face of your watch and the longer part of your NATO band. Slide the extended slide of the NATO band down and through, between the watch face and the spring bar, make sure it goes under the watch and then bring it up through between the other side of the spring bar and the watch face. You will want to make sure your band is lined up with the shorter side at the 12 o'clock and the longer band part on the six o'clock side.
Next, slide the longer part up through the ring keeper on the shorter part of your strap. The ring keeper holds the strap in place, and from here, it will look very similar to a regular watch band. All that is left to do is place your watch on your wrist, slide the longer end of the strap back through the final ring keeper. To finish, grab the other side and slip the end again over through the remaining ring keeper.
With so many variations in materials, colors, and strap styles, knowing and practicing how to change the strap on your watch yourself will set you up to be confident in swapping out your strap to suit your mood or replacing a spring bar when one gets broken.
Sources:
https://www.gearpatrol.com/watches/a539703/how-to-change-a-watch-strap/
https://www.benswatchclub.com/blog/how-to-remove-a-watch-strap
https://oureverydaylife.com/how-to-fix-a-leather-watch-band-12473558.html


